Developing my skills in blender: sculpting a head (learning dynamic topology & texturing)
- da2g19
- Nov 19, 2020
- 5 min read
Updated: Nov 24, 2020
One of the skills within Blender that I wanted to learn about is sculpting so that I can get used to the set of tools and how to use them, so to get started I wanted to create an alien head as I wanted to create something “simple” but complex so that I can adapt slowly and to practice using the tools (within the sculpting area of blender).

To start things off, I opened a new sculpting document which has a sphere (located in the middle) and a set of tools - located on the left hand side of the document - which have distinct shapes and colours (red, yellow and blue) the way you can tell if a tool has been currently selected is that the tool is highlighted by a light blue box which in this picture here there is a tool currently selected which is the draw/sculpt tool, I then started to turn this sphere to a “side view“ using the orbit gizmo (the tool with red, green and blue circled connected within each other).

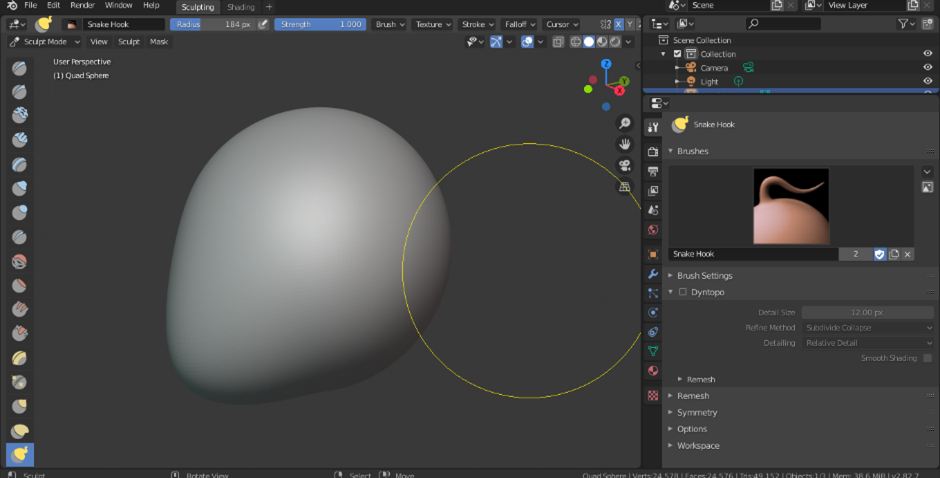

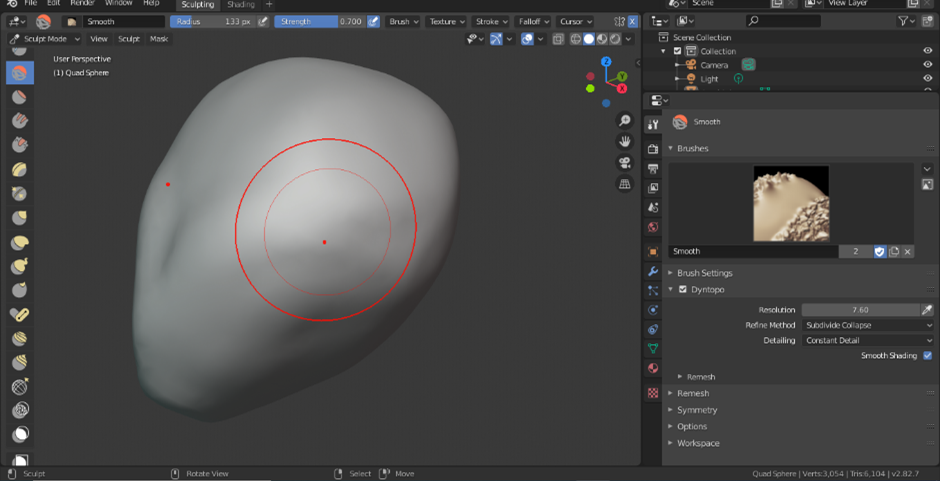
Then I used the snake hook tool to drag the circle into an almost elongated chin shape so that I can have a basic face shape to work with from there, though I still need to make the face less circular so I used a combination of the flatten tool and the smooth tool, I made sure to keep rotating the face and increasing/decreasing my brush size so that the face shape starts to become more “defined“ as well as being able to slowly start building up the face of my alien.

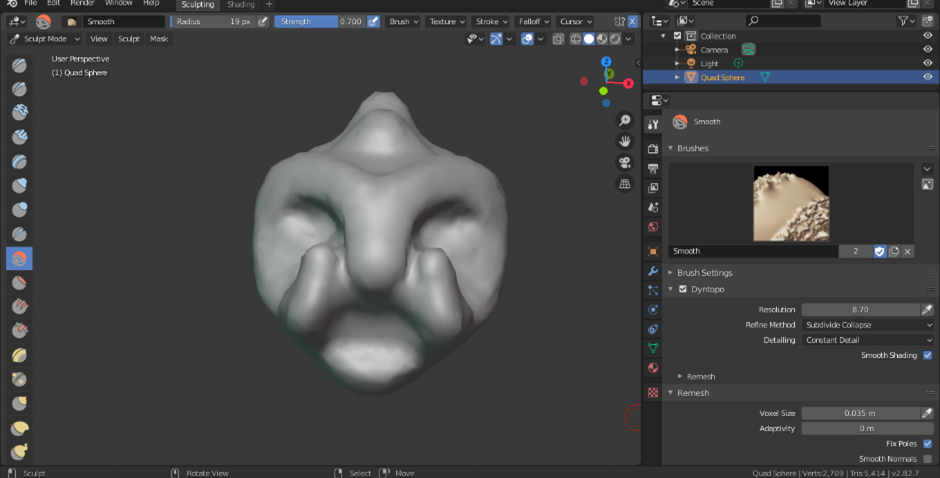

I now have the basic starting point of my alien which I slowly built up using the clay tool, smooth tool and the fill tool again changing the brush size and rotating the face so that I can have a basic mouth, “nose“, and eyes to build up and enhance the face, continuing to use the fill, clay and smooth tool I started to refine the mouth shape and deepened parts of the cheek areas and some parts of where the eyes would be located just so that I can refine the face shape to look less simple and more detailed.


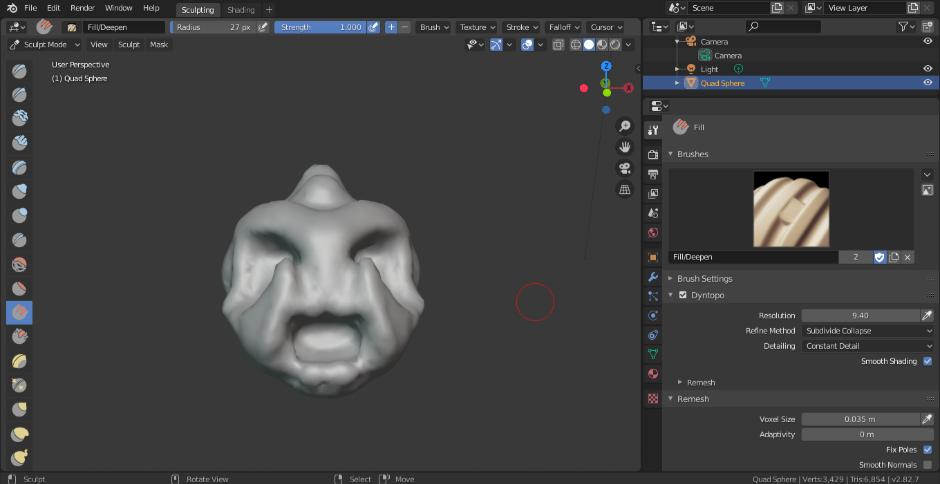
I decided to completely smooth and fill in the mouth of the alien as I didn’t really like how the mouth shape looked and I prefer the face without a mouth as the alien looks more threatening without the mouth plus it could communicate in another way rather than having a physical mouth that opens and closes when it speaks, I then started to create small divots using the scrape tool in the eye area to create the form of eye sockets as well as create an almost eyebrow shape using the clay tool to give a form of expression and to build up from the basic shape I started off with. Using the snake hook tool, I went to the bottom part of the alien’s face and stretched out a small portion of it so that I could create a neck shape for the creature and to form “shoulder bones” so that the alien isn’t a floating head.

I then needed to think about the eyes next so I went to the layout section of blender so that I could now create the eyes for the creature and added a UV sphere then positioned it to where one of the eye sockets are using the move tool, then using a mirror modifier to copy it to the other side of the face I now
have eyes for the creature which meant I had to adjust the face shape keeping these eyes in mind. I then started to add more details to the face by using the clay tool and the smooth tool by adding spore like details around the eyebrow area and creating an ear like shape then added the spore like details around the ear area too. I now have finished sculpting the face shape of the alien and now need to texture the creature now.


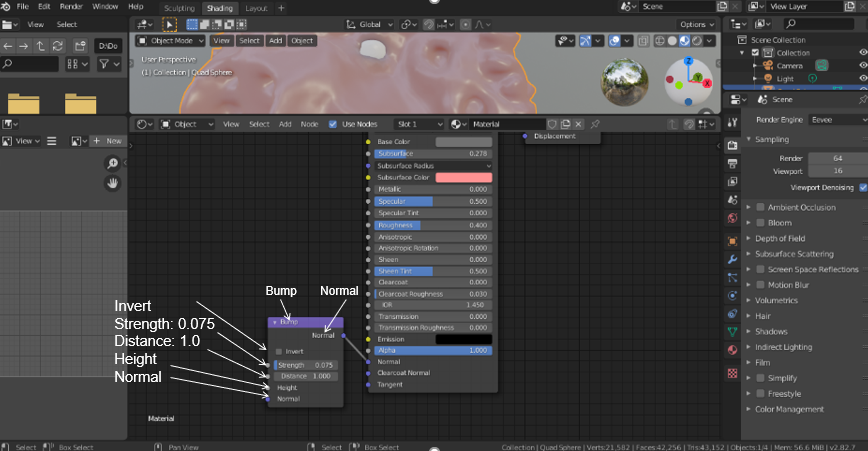
Now I need to texture the alien so that it can have a "realistic appearance“, I started off in the shading section of blender and adjusted the settings in the green box (in the first picture above) adjusting the colour of the alien so it now has colour to it now, then I added a purple vector node box called bump that will connect with the “normal output” in the green node box which can in itself bump the diffuse part of the shader which can simulate a bumpy surface coated with a smooth glossy layer so that this can make the skin of the alien feel realistic to touch.

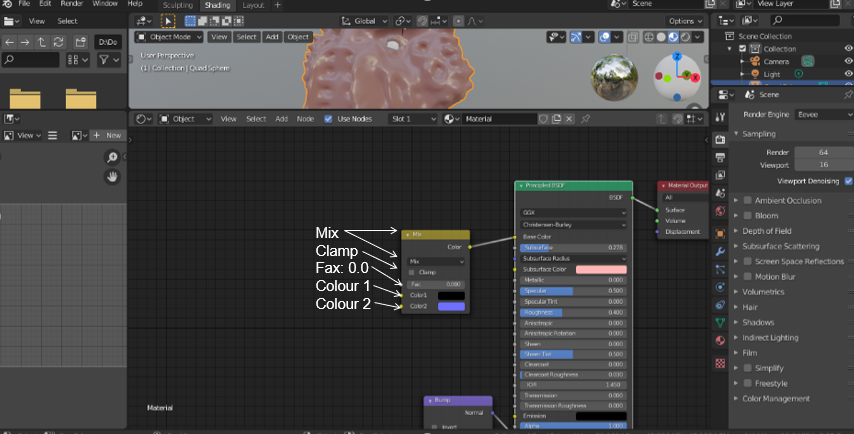

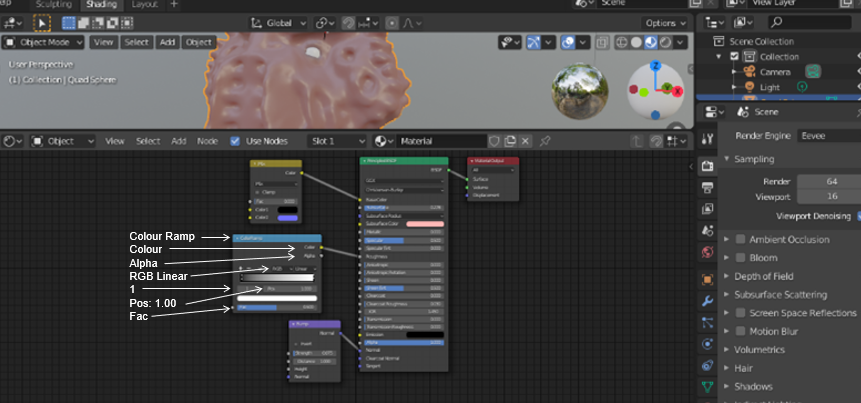

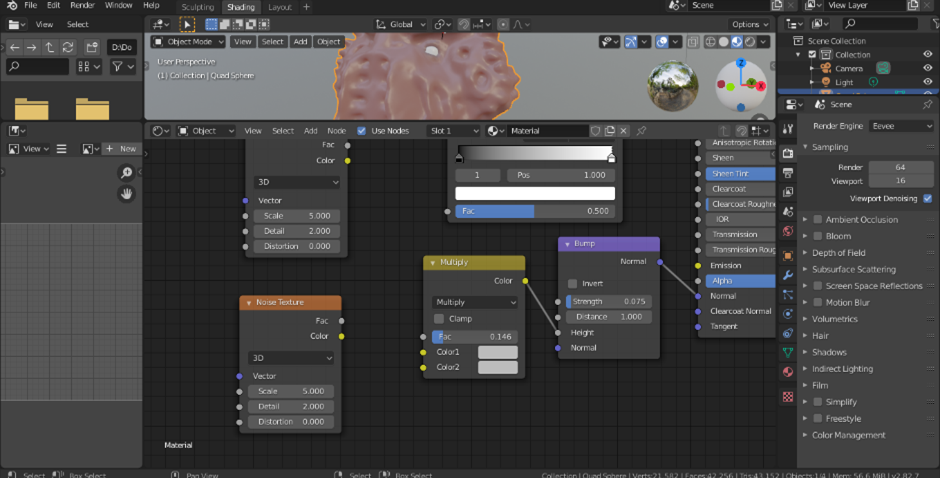
Then next I added a colour mix node box (yellow/beige colour) and connected it with the base colour output which will combine the colours I have put in the mix colour node (black and dark blue) and combine with the subsurface colour ‘light peachy shade) just to darken the colour as well as to make the colour less flat looking. Then I wanted to added a colour ramp node and connected it to the roughness output (of the main green node) just so the colour can be refined even more, then I added a multiply node box (which can be selected via the drop down box of the colour mix node box) which when connected to a noise texture will help create the glossy almost squishy type texture that my alien creature has.


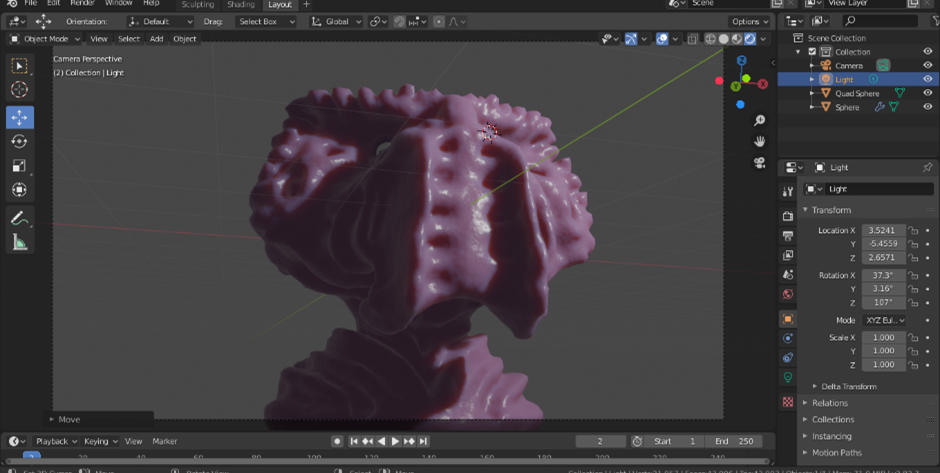
After completing the node set up for the texture of the aliens skin, I wanted to move the lighting and the camera around just so I can test out how lighting and how camera angles work and how they can capture the atmosphere of an image at first I wanted a more dominate type angle captured within my alien as when I showed off the image to a few people they mentioned how he looks quite villainous so an angle of it staring down at the viewer will help create that appearance though when I started to texture the eyes I ended up with a different direction instead.

After completing the texture of alien as I started on adding the bump node, linear light node (colour mix node) and colour ramp node to the main mode, I noticed that when I put the alien in the same angle again, that the colour of the alien turned into a mauve/pink colour which took me by surprise at first, but then I realised that colour was just the default colour for when you alter the base colour (in the green node box), so I changed it to a more beige almost skin like colour to add some “realism“ to the skin of the alien, the angle also weirdly made the eyes look almost lifeless so I had to angle the alien so that it could show a certain shine to the aliens eyes and to enhance the realism of the aliens appearance.
Overall, I’m proud of the outcome of the aliens appearance and how I have created it as I have now learnt about how the sculpting interface works within blender as well as knowing how texturing works and what ones to use for an image, I also learnt about how maneuvering the lighting and camera can create a certain atmosphere within an image which direction you angle the camera and direction you position the lighting. I like how by using certain textures such as the glossy texture that I’ve added to the creature created a squishy to the touch like texture you can almost touch and grab the skin and move it around.
If I were to improve this sculpt, I would have added a bumpy like appearance to the face and some within the neck area alongside the glossy texture but to keep the gloss to a minimum by using the clay tool and adding tiny small circles within the aliens face to create a bumpy like appearance to the creature.

Comments